
Also serving the communities of De Luz, Rainbow, Camp Pendleton, Pala and Pauma
Also serving the communities of De Luz, Rainbow, Camp Pendleton, Pala and Pauma
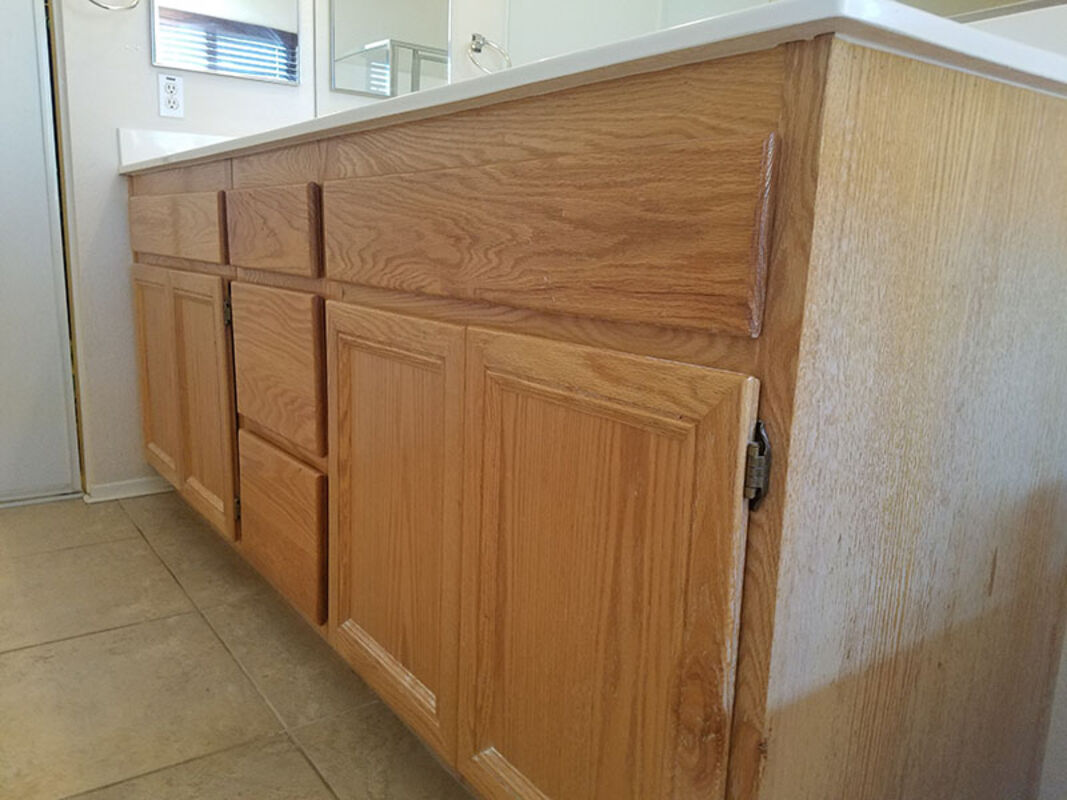
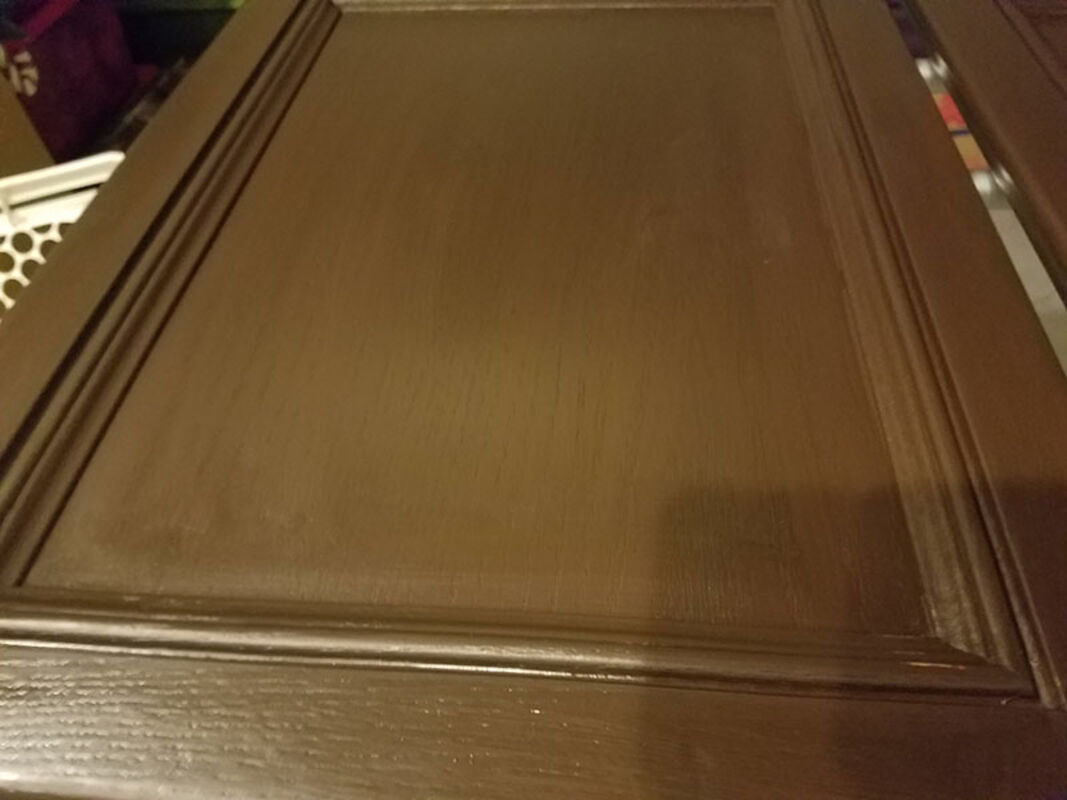
Before the cabinet transformation, 16-year-old cabinets look dull and dingy
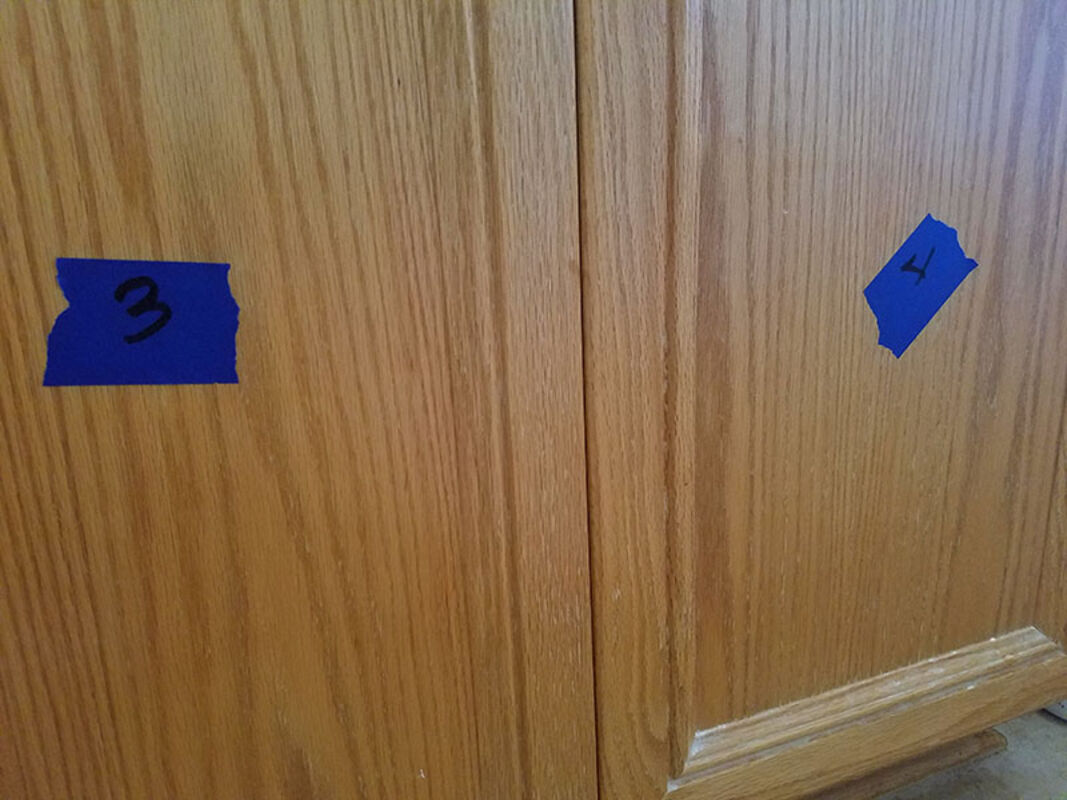
After cleaning all the cabinets, it's wise to make a diagram then label the doors, so everything goes back where it belongs during assembly
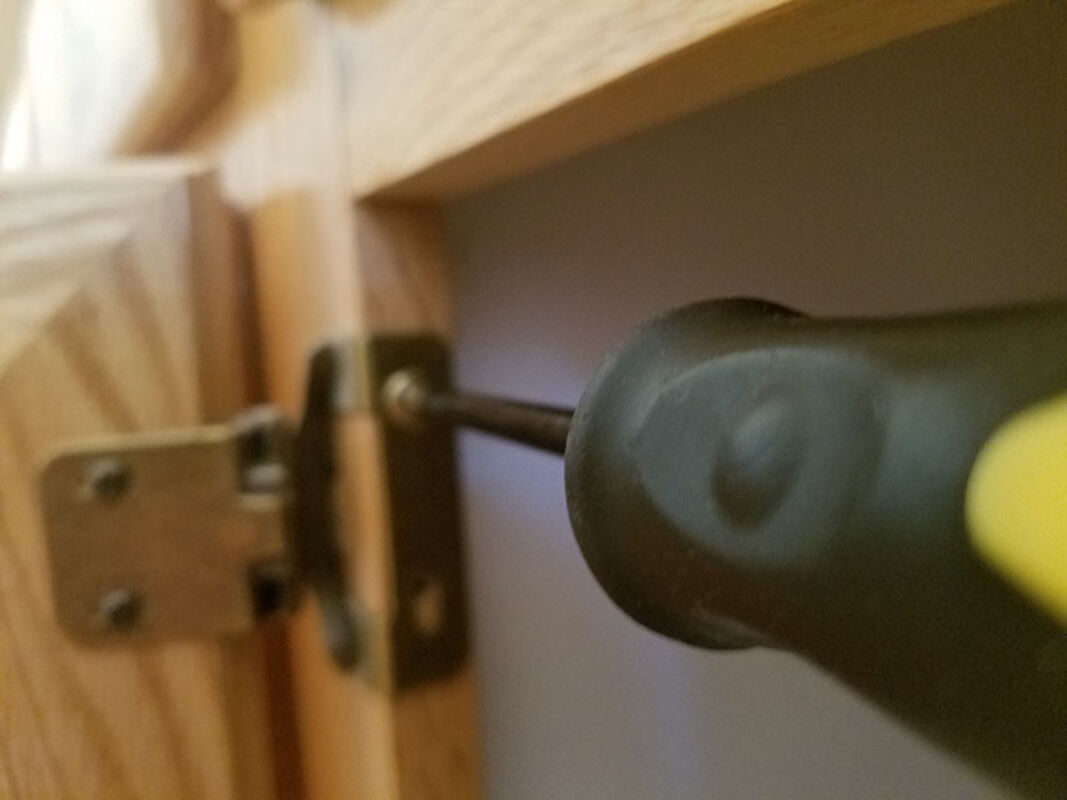
Remove all the doors, drawers and hardware from everything that is going to be refinished
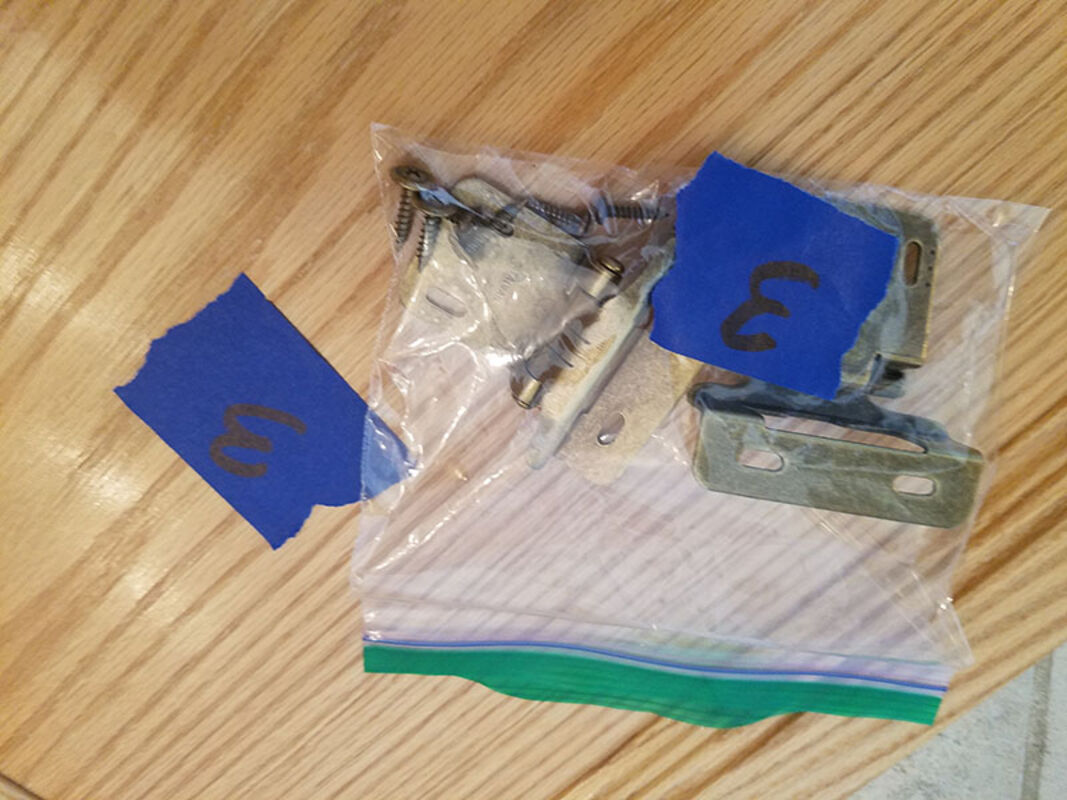
Put hardware in a baggie and label it with the same number of the door or drawer it came from to make reinstallation a snap.

After deglossing all the doors, drawers and cabinet frames, be sure to tape the frames off to prevent any of the bond coat from bleeding through

After coating the back side of the cabinet doors and drawers, begin the front of each using long strokes that follow the grain of the wood
After adding the bond coat, let the doors dry for a minimum of two to three hours before coating each door with the new glazing.
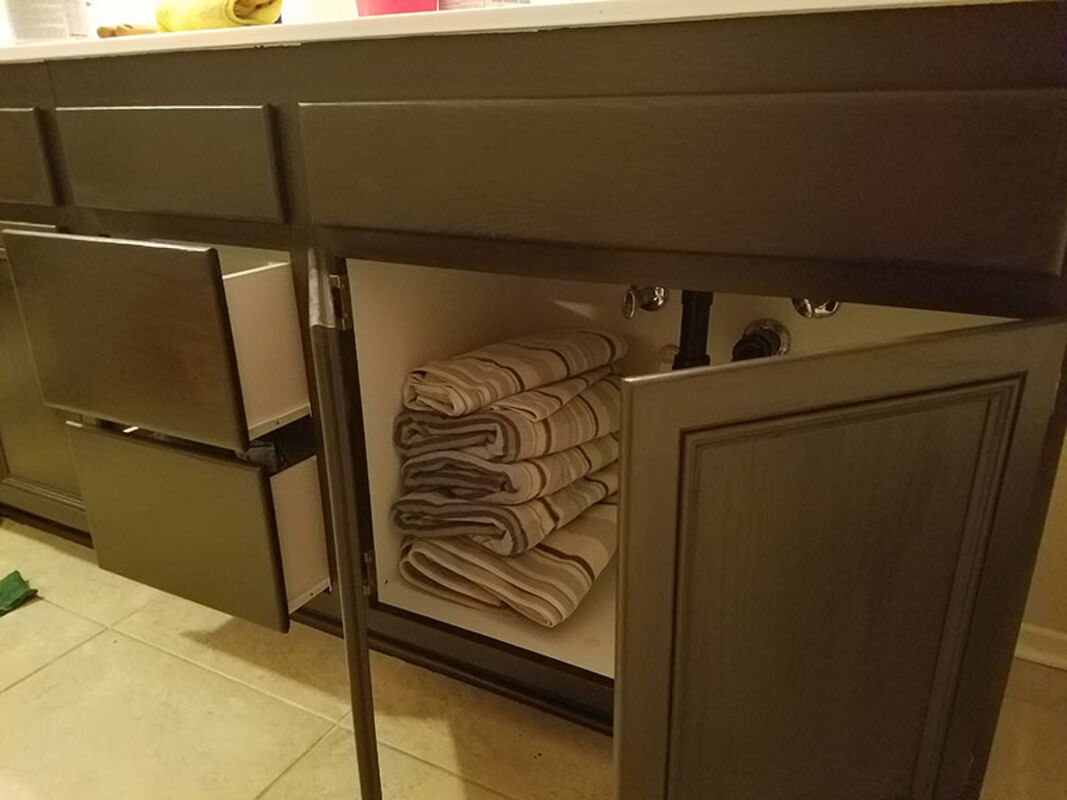
Once the deglazing and top coat have been applied and have dried, reinstall the drawers and cabinet drawers, leaving them slightly open for 24 hours so they can dry completely before use

Rustoleum Cabinet Transformations comes in a variety of finishes.
I love my house; I really do. It's 16 years old though, and the previous owners didn't bother to update much or do any type of renovation projects. One of the first things I did upon moving in was make a list of projects, and near the top of that list was new cabinets for the kitchen and baths.
As I began to get estimates to replace those dingy, dull cabinets, I quickly learned that the cost was quite prohibitive. You can imagine my excitement when I stumbled across the Rustoleum Cabinet Transformations kit while looking at paint in one of the home improvement box stores. I quickly snapped one up and brought it home, eager to start another home improvement project to make my house my own.
The kit comes with everything needed except painter's tape and paint brushes and at just under $80 is a steal for refinishing those old cabinets. There is no stripping or sanding or any of those other time-consuming projects I hate when it comes to refinishing wood, so I was really excited to try it out and see how it worked. I chose to start with my master bath since it only has four cabinet doors and three drawers.
As with any unknown product, I was worried that it wouldn't deliver as promised, but boy, was I wrong.
I started by watching the DVD that came with the kit to be familiar with the process, before setting to work. I removed the cabinet doors and drawers, cleaned everything thoroughly and taped off the cabinet frames before beginning the deglossing step, just like instructed.
Once that step was done, I used the deglosser and the scrub pad from the kit to degloss all of my cabinets and let them dry for about an hour before I began applying the espresso-colored bond coat I choose to give my bathroom some depth of color.
The worst part with the bond coating was having to wait for each side to dry between steps, but I managed to find other things to do during the two hours it took to dry. Once it was done, I did a second coat and let it dry another two hours, the downside to this process was after all time spent on the front and back and drying, it took me roughly 12 hours to complete the first step.
The next morning, I began the glazing process. It only took me about an hour and a half to glaze everything, but once again, I was left trying to find something to do while I waited the recommended eight hours for everything to dry.
I applied the top coat before I went to bed that second night since the recommended drying time for the top coat was 12 hours. A couple of important notes regarding top coating: the kit instructions recommend having a dry brush on hand to remove any top coat buildup that may occur in the corners and grooves. I would recommend having two dry brushes on hand since there was a lot of buildup in those corners, and my first brush was quickly saturated after doing the cabinet doors. Also, keep in mind the top coat dries fast, as in really, really fast, so make sure to fix any drips or buildups as they happen. If you don't, you may find yourself back at square one, like I did with my first door.
The third morning, after the 12 hours drying time was up, I reattached all my doors and reinstalled all my drawers and removed all the painter's tape. I left everything open slightly for about 24 hours before using them to make sure everything was dry.
While there was a lot of waiting between steps and I ran into issues with the topcoat on my first door, I was really happy with how this project turned out and discovered that while my cupboards are worn and old, it's nothing that couldn't be fixed with a little time and a good kit system.
I plan on using this same kit in my other two bathrooms and kitchen, ultimately saving myself close to $15,000 in cabinet replacements.
Reader Comments(0)